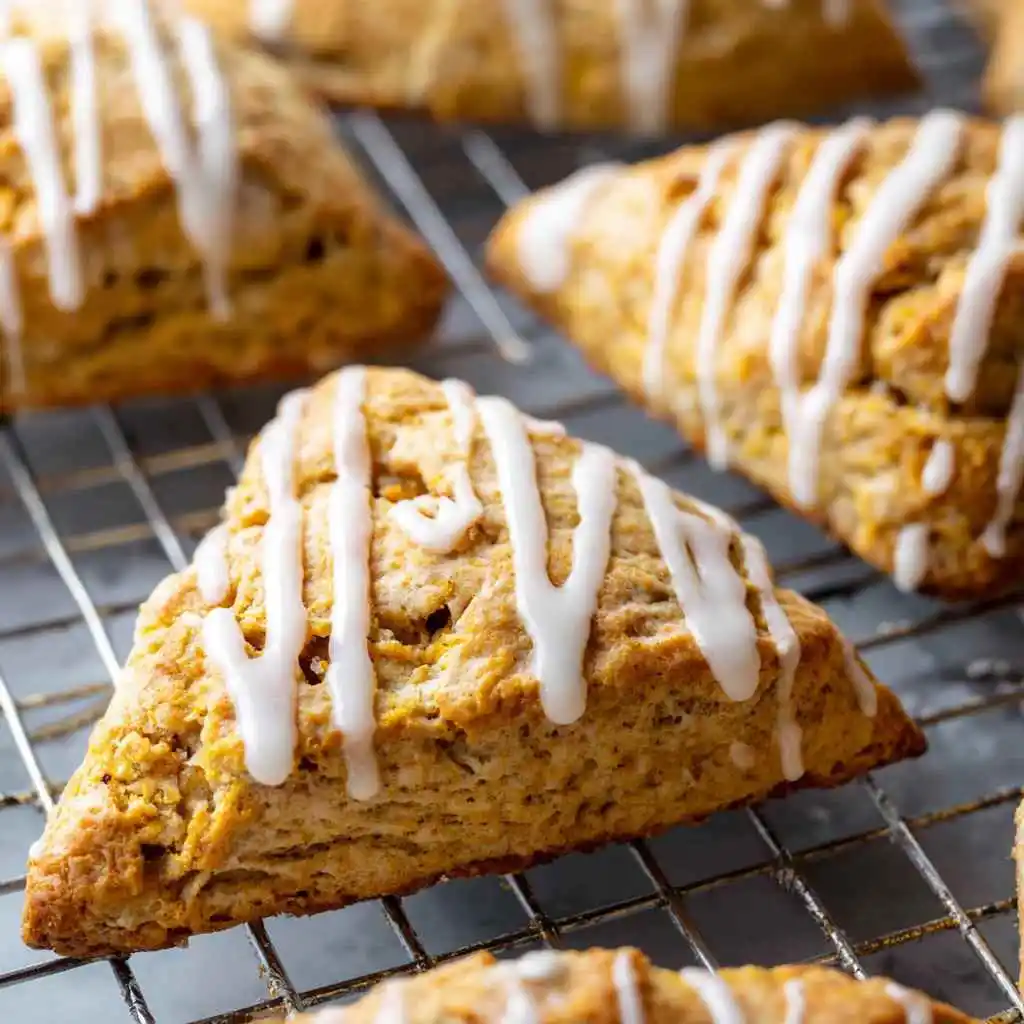
Easy Pumpkin Scones are the cozy comfort food your fall mornings deserve. With warm spices, real pumpkin, and a sweet maple glaze, these scones feel like a bakery treat—but they’re surprisingly simple to make at home. Whether you’re brand new to baking or just looking for a recipe that doesn’t involve complicated steps, this one’s for you. In this article, I’ll walk you through every step of creating pumpkin scones that are tender, flaky, and full of flavor. You’ll also find expert tips, FAQs, and the secrets behind bakery-worthy results every time.
Table of Contents

Easy Pumpkin Scones Recipe – Fluffy, Moist, and Perfect for Fall
- Total Time: 35 minutes
- Yield: 8 scones 1x
Description
These easy pumpkin scones are tender, flaky, and full of cozy fall flavors. Made with real pumpkin puree, warm spices, and topped with a sweet maple glaze, they’re perfect for breakfast or an afternoon treat.
Ingredients
Scones:
-
2 cups (250g) all-purpose flour (spooned & leveled)
-
2 1/2 teaspoons baking powder
-
1 teaspoon ground cinnamon
-
1 1/2 teaspoons pumpkin pie spice
-
1/2 teaspoon salt
-
1/2 cup (113g) unsalted butter, frozen
-
1/3 cup + 2 tablespoons (105ml) heavy cream, divided
-
1 large egg
-
1/2 cup (115g) canned pumpkin puree, blotted
-
1/2 cup (100g) light brown sugar
-
1 teaspoon pure vanilla extract
-
Optional: coarse sugar for sprinkling
Maple Glaze (Optional):
-
2 tablespoons (28g) unsalted butter
-
1/3 cup (80ml) pure maple syrup
-
1 cup (112g) sifted confectioners’ sugar
-
Pinch of salt, to taste
Instructions
Instructions:
-
Preheat oven to 400°F (204°C) and place a rack in the center.
-
In a large bowl, whisk together the flour, baking powder, cinnamon, pumpkin pie spice, and salt.
-
Grate the frozen butter into the flour mixture. Toss to coat the butter in the dry ingredients until crumbly.
-
In a separate bowl, whisk the 1/3 cup heavy cream, egg, pumpkin puree, brown sugar, and vanilla.
-
Pour the wet mixture into the dry ingredients and stir just until a shaggy dough forms. Avoid overmixing.
-
Turn the dough out onto a lightly floured surface. Pat into a 7-inch disc. Slice into 8 wedges.
-
Place scones on a parchment-lined baking sheet and chill in the fridge for 15 minutes.
-
After chilling, brush the tops with remaining 2 tablespoons of heavy cream. Sprinkle with coarse sugar if desired.
-
Bake for 15–20 minutes, or until tops are golden and a toothpick inserted into the center comes out clean. Let cool.
-
(Optional) To make glaze: Heat butter and maple syrup together, then whisk in powdered sugar and a pinch of salt. Drizzle over cooled scones.
- Prep Time: 15 minutes
- Cook Time: 20 minutes
- Category: Breakfast
- Cuisine: American
Nutrition
- Calories: 290
- Fat: 14g
- Carbohydrates: 37g
- Protein: 4g
Keywords: easy pumpkin scones, fall baking, pumpkin scones recipe, maple glaze scones, Pumpkin pie spice, maple syrup, brown sugar, canned pumpkin
How I Fell in Love With Easy Pumpkin Scones
From Flop to Favorite: My Scone Story
When I first started baking, easy pumpkin scones weren’t even on my radar. Honestly, I thought scones were dry, crumbly, and way too fussy for a weeknight project. But after one failed attempt at pumpkin bread and a bit of canned pumpkin left in the fridge, I decided to give them a go. After several attempts and a bit of adjusting, I finally landed on a scone that was tender, flaky, and packed with pumpkin flavor and warm autumn spices.
Like when I first tackled my grandmother’s chicken and dumplings—a total disaster that somehow sparked a lifelong love of cooking—these scones became a turning point. Now, easy pumpkin scones are my go-to fall treat. They’re fast, forgiving, and absolutely delicious with a cup of coffee or tea.
For more simple, seasonal bakes like this one, check out my baking for beginners section and my guide to Pumpkin Chocolate Chip Cookies, where I break things down step-by-step.
The 15-Minute Chill That Makes a Big Difference
One of the most important steps when making easy pumpkin scones is to chill the shaped dough before it hits the oven. This 15-minute rest in the fridge helps keep the butter cold, which is key to flaky texture. As the butter melts during baking, it releases steam that lifts the dough—giving your scones that lovely rise and layered feel.
Skipping this step can make your scones spread too much or fall flat. Just a quick chill makes all the difference between average and bakery-style results.
The Trick to Perfect Pumpkin Scones Every Time
If you want your easy pumpkin scones to turn out soft on the inside and crisp at the edges, don’t overmix. Use frozen butter, grate it into the flour, and stir until the dough just comes together. Overmixing can develop gluten, making your scones chewy instead of tender.
Another tip? Blot your pumpkin puree before adding it in. Canned pumpkin is great, but it holds a lot of moisture. Pressing it between paper towels removes excess liquid so your scones don’t turn soggy in the center.
Mastering Texture and Flavor in Easy Pumpkin Scones
How to Achieve Tender, Moist Scones Every Time
To make tender easy pumpkin scones, start with very cold ingredients. Cold butter is essential—it creates steam as it melts, helping the scones rise while forming delicate, flaky layers. Grate frozen butter directly into the flour to spread it evenly without overmixing. Combine the dry ingredients first, then gently stir in the pumpkin puree, cream, sugar, and egg. The dough should have a coarse texture and just start to stick together without being fully combined.
Avoid the urge to keep mixing. Overworking the dough develops gluten, which leads to dense or chewy scones. Handle the dough quickly and press it gently into shape without kneading.
One common mistake is using too much moisture. That’s why blotting the pumpkin puree before using it is so helpful. Canned pumpkin can be watery, and too much liquid affects the structure. Removing that excess makes a big difference in the final texture.
Choosing the Best Pumpkin for Flavor and Structure
The kind of pumpkin you use will affect both taste and moisture. For most people, canned pumpkin labeled as “100% pure” works best—it’s thick, smooth, and consistently flavorful. If you’re using fresh pumpkin, sugar pie pumpkins are ideal because they’re naturally sweet and less watery than larger carving pumpkins. After roasting, mash or puree the flesh, then blot it well with paper towels.
Avoid canned pumpkin pie mix, which includes spices and sugar—it throws off the flavor and balance of the scones. Controlling your own spice and sweetness is the key to perfecting easy pumpkin scones that taste homemade and fresh, not overly sweet or artificial.
Cozy spices such as cinnamon and pumpkin pie spice deepen the pumpkin’s natural flavor and bring that familiar autumn warmth to every bite. Use them generously, but in balance, to keep your scones flavorful without being overpowering.
Baking and Glazing Your Easy Pumpkin Scones
How to Bake Easy Pumpkin Scones Perfectly
Set your oven to 400°F (204°C) and place the rack in the center for uniform heat. Arrange the chilled easy pumpkin scones on a parchment-lined baking tray to prevent sticking. Bake them for 15 to 20 minutes, until the tops are lightly golden and a toothpick inserted in the center comes out clean.
Resist opening the oven too soon; this helps the scones rise properly without collapsing. The cold butter and baking powder work together during baking to create a light, fluffy texture. Keep a close eye near the end of baking to avoid drying out the scones, which can happen if baked too long.
Preparing the Maple Glaze for a Sweet Finish
While baking, prepare a simple maple glaze by melting unsalted butter over low heat. Stir in pure maple syrup and sifted powdered sugar, adding just a pinch of salt to balance the sweetness.
After the scones have cooled slightly, drizzle the glaze over each one generously. This sticky glaze pairs perfectly with the warm spices and moist texture of the scones. For added texture and sparkle, you can sprinkle coarse sugar over the scones before baking.
The combination of tender scones and sweet glaze makes these easy pumpkin scones a delightful treat for any autumn day.
Serving and Storing Your Easy Pumpkin Scones

Best Ways to Serve Easy Pumpkin Scones
Easy pumpkin scones shine when served warm, fresh out of the oven or lightly reheated. Their soft, tender crumb and sweet maple glaze pair perfectly with a hot cup of coffee, tea, or even warm apple cider for a cozy fall experience. For a simple treat, enjoy them plain or add a pat of butter that melts into the warm scone for extra richness.
You can also get creative by serving them with cream cheese or a smear of pumpkin butter for an added layer of flavor. These scones work beautifully for breakfast, brunch, or a comforting snack anytime during the day.
How to Store and Reheat Easy Pumpkin Scones
To keep your easy pumpkin scones fresh, store them in an airtight container at room temperature for up to two days. If you want to keep them longer, wrap each scone tightly in plastic wrap or foil and freeze for up to three months.
When ready to enjoy, thaw frozen scones at room temperature, then warm them in a preheated oven at 350°F (175°C) for about 10 minutes to revive their flaky texture and fresh flavor. Avoid microwaving, as it can make the scones soggy.
Proper storage and reheating help maintain the moistness and delicate crumb that make these scones a fall favorite.
Conclusion
Making easy pumpkin scones is a wonderful way to bring the flavors of fall into your kitchen without spending hours baking. With just a few simple ingredients, some cold butter, and the right techniques like chilling the dough and balancing moisture, you can create tender, flaky scones bursting with pumpkin spice goodness. Whether you enjoy them fresh with a warm cup of tea or store them for later, these scones are sure to become a seasonal favorite. Remember, baking is all about practice and joy—so have fun, experiment, and savor every delicious bite!
For more recipes follow me in Facebook
Frequently Asked Questions About Easy Pumpkin Scones
What is the 15-minute rule for scones?
This approach involves refrigerating the shaped scone dough for approximately 15 minutes prior to baking. Keeping the dough cold preserves the butter’s firmness, allowing it to release steam in the oven and create scones that are tender, flaky, and properly risen
What is the trick to making good scones?
A great scone depends on keeping the butter cold and mixing the dough gently. When you incorporate cold butter into the flour and mix the dough just until it comes together, tiny butter pockets remain. These melt during baking, creating flaky layers and producing scones that are both light and tender.
What is the secret to moist scones?
Moisture in scones comes from balancing ingredients correctly. Pumpkin puree naturally adds moisture, but removing excess liquid helps avoid sogginess. Also, baking just until the scones turn golden ensures they stay soft inside without drying out.
Which pumpkin is best for scones?
Canned pumpkin labeled 100% pure is ideal for its consistent texture and flavor. If you prefer fresh pumpkin, sugar pie pumpkins are best because they are naturally sweeter and contain less water. Roast and puree them, then drain any extra moisture before adding to your recipe.